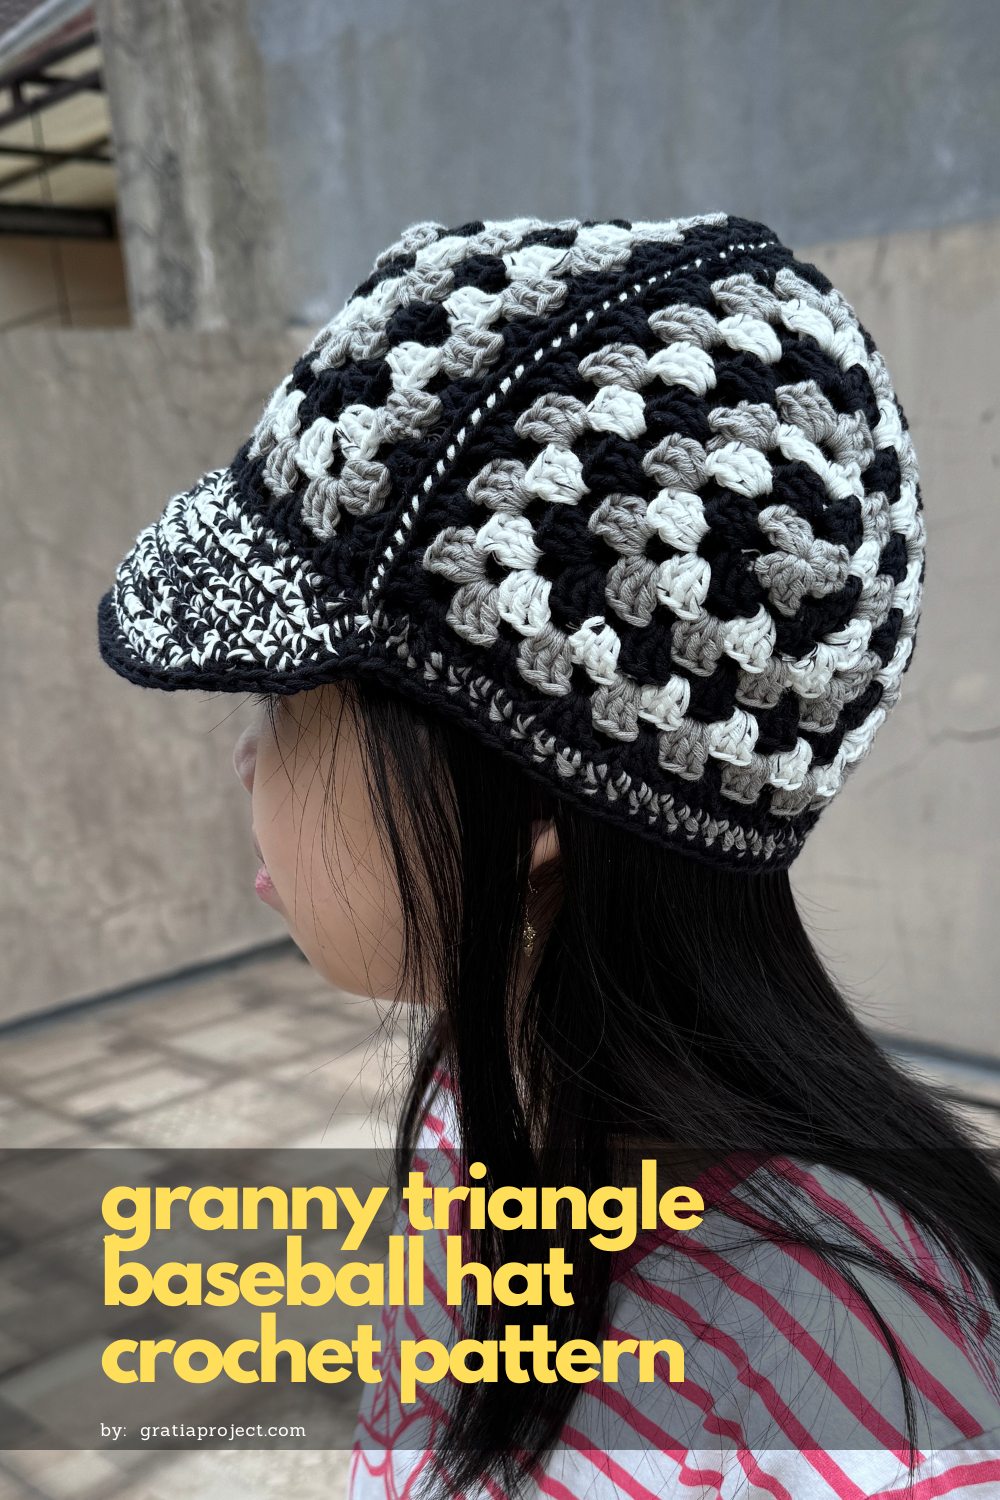
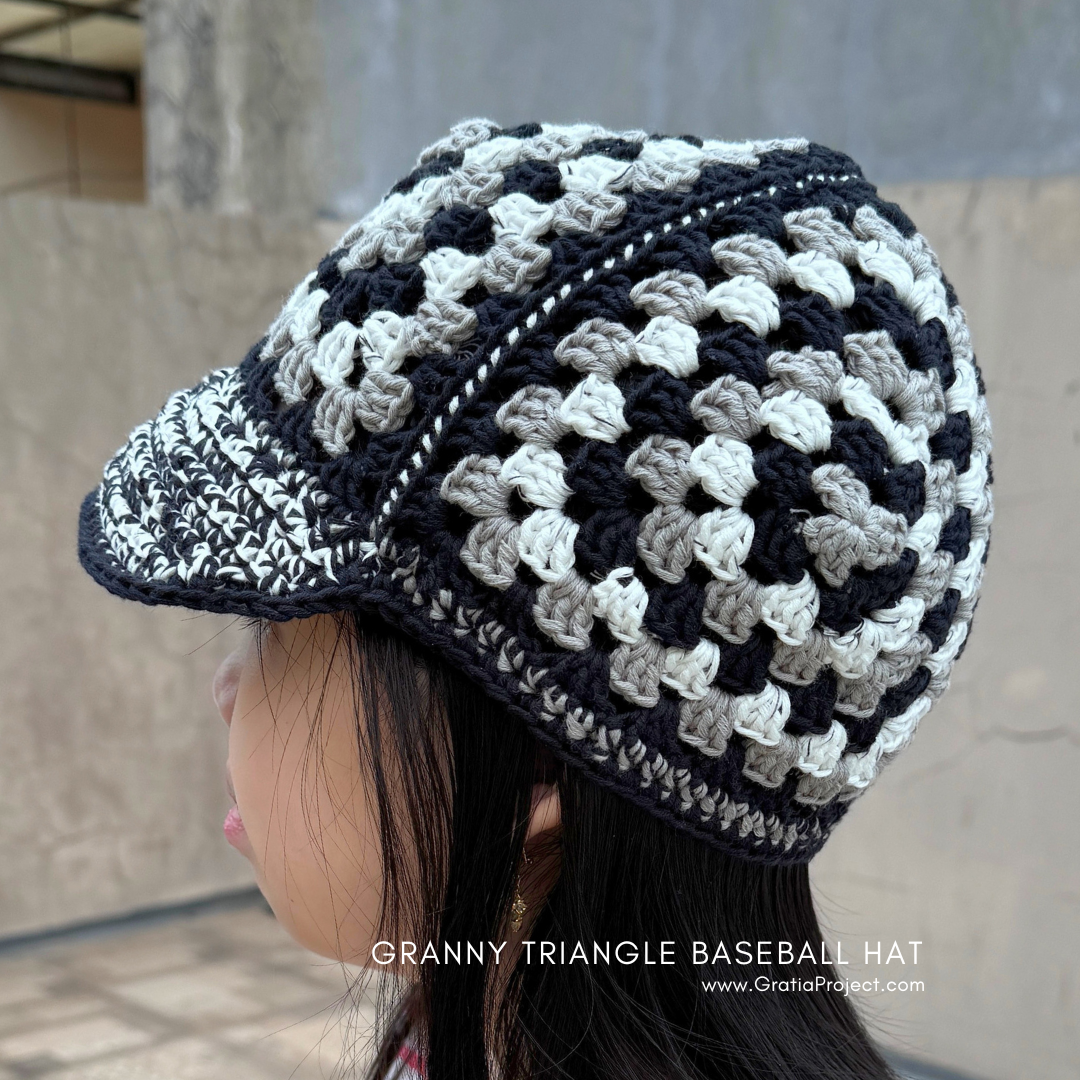
Granny Triangle Baseball Hat
In this tutorial, I’ll show you how I make my Granny Triangle Baseball Cap. It’s a fun mix of classic granny stitch triangles and a sporty baseball cap style. Super cute and easy to make—perfect for adding a handmade touch to your outfit. Let’s get started.
Granny Triangle Baseball Hat by Effi GratiaProject.com
Some links may be affiliate links which will allow me to make a commission for purchases made through the following link.
Materials:
100% Cotton yarn 10-ply (color white, gray, black) less than 1 ball for each color.
3.5mm or 6/0 crochet hook
Stitch marker
Tapestry needle
Scissors
ABBREVIATIONS (US Crochet Terms)
MR: Magic Ring
st(s): stitch(es)
sl st: slip stitch
ch: chain
hdc: half double crochet
fphdc: front post half double crochet
dc: double crochet
inc: increase (make 2 stitches in the same space)
R: Round
[#]: number of stitche(s) in a row/round
NOTES
The hat has a diameter of 21 inches. It is made from 3 granny triangles, each with sides measuring 7 inches.
Use 1 strand (1-ply) for the granny triangle.
For the band and brim, hold 2 strands together and use the same hook for a firmer texture.
The granny triangle uses a color change every round; tie or weave the new yarn end with the previous tail to keep the work neat and secure.
GRANNY STITCH TRIANGLE PATTERN (make 3)
R1 (Grey):
Make a magic ring. Ch 3 (counts as dc), 2 dc into ring, ch 3, 3 dc into ring, ch 3, 3 dc into ring, ch 3.
Join with slip stitch to top of first ch 3. Cut yarn.
R2 (Black):
Join black yarn in any ch-3 corner space.
Ch 3, 2 dc, ch 3, 3 dc in same corner space. Ch 1.
{3 dc, ch 3, 3 dc} in next ch-3 space, ch 1. Repeat 2 times.
Join with slip stitch to top of starting ch 3. Cut yarn.
R3 (White):
Join white yarn in any ch-3 corner space.
Ch 3, 2 dc, ch 3, 3 dc in same corner space. Ch 1.
In each ch-1 space between clusters: 3 dc, ch 1.
In each ch-3 corner space: 3 dc, ch 3, 3 dc, ch 1. Repeat around.
Join with slip stitch to top of starting ch 3. Cut yarn.
Repeat R3:
Continue repeating Round 3—changing yarn color each round in the order Grey, Black, White—until Round 8 or until each side of the triangle measures about 7 inches (which is one-third of the hat’s diameter).
Whip Stitch to Join Granny Triangles:
Place two granny triangles together with right sides facing and edges aligned.
Cut a 21-inch yarn strand and thread it through a tapestry needle.
Insert the needle through both corner stitches from back to front.
Stitch along the edge, going through both pieces each time. Keep the yarn snug, but not too tight.
When you reach the end, tie off and weave in the tail.
Cut a 42-inch yarn strand to attach the third triangle.
Test the fit of your hat before adding the band and brim.
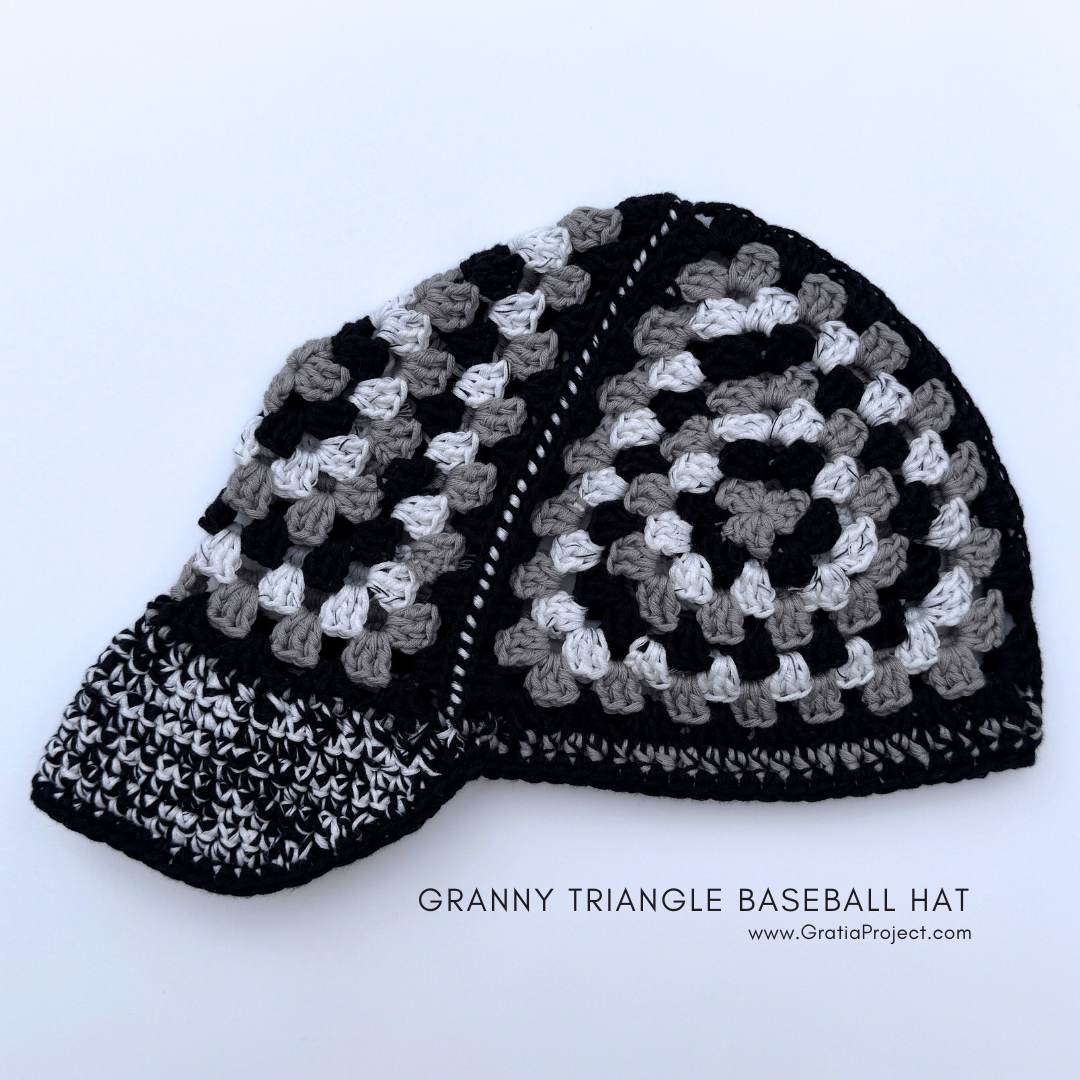
PATTERN FOR THE BAND
For the band pattern, hold two strands of yarn together (black and grey) and use the same hook to create a firmer texture.
Attach the yarn to any space between the triangles. Chain 2, then work one half double crochet (hdc) in each stitch around. Join with a slip stitch (sl st) to the first chain-2. Cut the yarn and fasten off.
PATTERN FOR THE BRIM
For the brim pattern, hold two strands of yarn together (black and white) and use the same hook to create a firmer texture. The brim pattern will follow the length of the front triangle, plus 2 extra stitches—one on each end.
Row 1: Start one st before the front triangle. Attach the yarn, ch 2, then work fphdc in each st until one st after the front triangle.
Row 2: Ch 1, turn. (Sc, increase) — repeat this pattern across until the last stitch.
Row 3: Ch 1, turn. Skip the first st, then sc in each st until one space before the end (decreasing 2 sts total).
Rows 4–8: Repeat Row 3.
Cut the yarn.
FINISHING
Holding two strands of black yarn together, single crochet in each stitch around the entire hat and brim. Join with a slip stitch and weave in all ends.