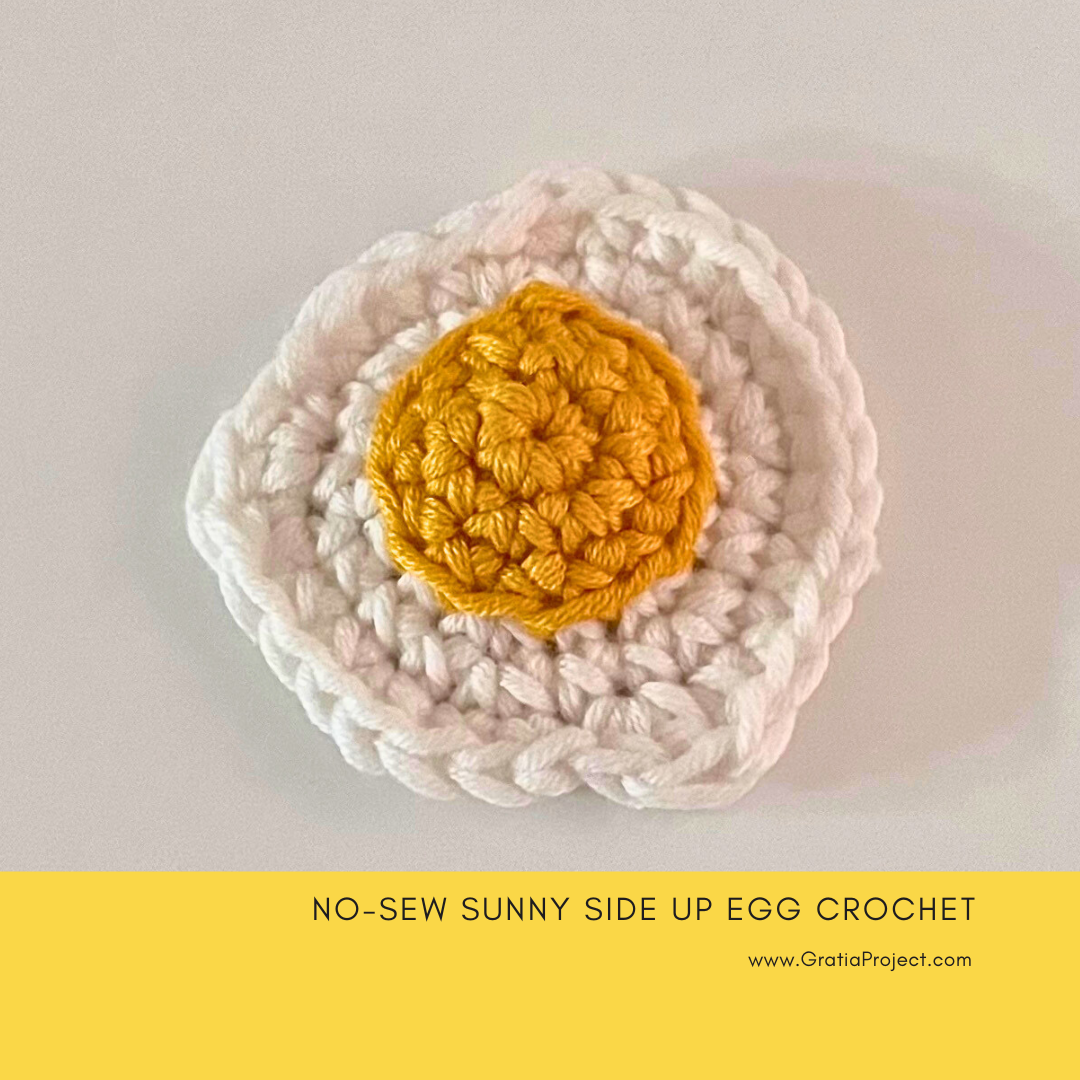
No Sew Sunny Side Up Egg Crochet Tutorial | Mini Amigurumi
Hey everyone.. Today we’re making a super cute sunny side up egg. This is a beginner-friendly project that’s great as a patch, keychain, or just something fun to make. Let’s get started!
No-Sew Sunny Side Up Egg Amigurumi Crochet Pattern by Effi GratiaProject.com
* Some links may be affiliate links which will allow me to make a commission for purchases made through the following link.
MATERIALS
DK weight yarn (cotton used here)
3 mm crochet hook
Stitch markers
Tapestry needle
Scissors
ABBREVIATIONS (US Crochet Terms)
st(s): stitch(es)
sl st: slip stitch
MR: Magic Ring
ch: chain
sc: single crochet
hdc: half-double crochet
dc: double crochet
inc: increase (2 sc in the same stitch)
R: Round
[#]: total stitch count for the round
NOTES
Use a stitch marker to mark the first stitch of each round.
Pattern for Yolk (Yellow)
R1: MR, sc 6 [total 6 sts]
R2: inc x6 [12]
R3: sc in each st around [12]
Fasten off.
Egg White
R1: MR, sc 6 [6]
R2: inc x6 [12]
R3: Holding yolk in front of white, crochet through back-loops of Yolk and both-loops of Egg White: (inc, sc) x6 [18]
R4: (sc, inc, sc) x6 [24]
R5: (inc, sc 3) x6 — randomly replace some sc with sl st, hdc, or dc to make a wavy, uneven edge like a fried egg [total 30 sts]
Example for R5: {(sc-sc in the same stitch, sc, sc, sl st), (hdc-dc in the same stitch, hdc, sc, sc)} x2, then (inc, sc 3) x2 [total 30 sts]
Fasten off and weave in all the yarn tails.
Post the crochet you made from my tutorial on your Instagram and tag me ♡ My Instagram.
Youtube Channel: @GratiaProject.


followed your pattern and my little egg turned out so cute! thank you <3